Backing up your files is crucial to protect against data loss due to accidental deletion, hardware failure, or malware attacks. Windows provides a built-in tool called File History that offers an efficient way to back up and restore your personal files. This guide will walk you through the process of setting up, customizing, and restoring files using File History in both Windows 10 and Windows 11.
What Is File History?
File History is a feature in Windows that automatically backs up files stored in your libraries, desktop, contacts, and favorites. It saves copies of your files to an external drive or network location, allowing you to restore previous versions if needed. Unlike a full system backup, File History focuses on personal files, making it a lightweight and effective solution for data protection.
Step 1: Set Up File History
For Windows 10:
- Connect an External Drive: Plug in an external hard drive or USB drive to your computer. Ensure it has sufficient storage space for your backups.
- Open Settings: Click on the Start menu and select Settings.
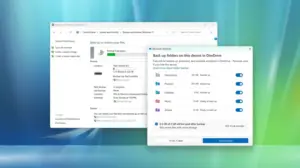
- Navigate to Backup Settings: Go to Update & Security > Backup.
- Add a Drive: Under the Backup using File History section, click on Add a drive and select your external drive from the list.
- Turn On File History: Once the drive is added, toggle the switch to On to enable File History.
For Windows 11:
- Connect an External Drive: Insert an external hard drive or USB drive into your computer.
- Open Settings: Press Win + I to open the Settings app.
- Access Backup Settings: Navigate to System > Storage > Advanced storage settings > Backup options.
- Add a Drive: Under the Back up using File History section, click on Add a drive and choose your external drive.
- Enable File History: Toggle the switch to On to activate File History.
Step 2: Customize Backup Settings
To tailor File History to your needs, you can adjust the backup frequency, retention period, and exclude specific folders.
- Open File History Settings: In the Backup options window, click on More options.
- Set Backup Frequency: Under the Back up my files section, choose how often you want File History to back up your files. Options range from every 10 minutes to daily.
- Set Retention Period: Under the Keep my backups section, select how long you want to keep your backups. Options include Until space is needed, 1 month, 3 months, 6 months, and 1 year.
- Exclude Folders: To prevent certain folders from being backed up, click on Exclude these folders and then Add a folder. Browse to the folder you want to exclude and select it.
- Save Changes: After making your adjustments, click Back up now to apply the changes.
Step 3: Add or Remove Folders from Backup
By default, File History backs up files in your libraries (Documents, Music, Pictures, Videos) and on your desktop. To include additional folders or remove unnecessary ones:
- Open File History Settings: In the Backup options window, click on More options.
- Add a Folder: Under the Back up these folders section, click on Add a folder. Browse to the folder you want to include and select it.
- Remove a Folder: To remove a folder, click on it in the list and then click Remove.
- Save Changes: Click Back up now to apply your changes.
Step 4: Restore Files Using File History
If you need to restore a file or folder to a previous version:
- Open File Explorer: Navigate to the folder that contained the file or folder you want to restore.
- Access Previous Versions: Right-click on the folder and select Restore previous versions.
- Select a Version: In the Previous Versions tab, you’ll see a list of available versions. Select the version you want to restore.
- Restore the File: Click on Restore to recover the selected version. If you want to restore it to a different location, click on Restore to and choose the desired location.
Tips for Effective Use of File History
- Use a Dedicated Backup Drive: For optimal performance, use an external hard drive dedicated solely to backups.
- Keep the Backup Drive Connected: Ensure your backup drive is connected regularly to allow File History to perform automatic backups.
- Monitor Backup Space: Regularly check the available space on your backup drive to ensure it doesn’t run out of space.
- Test File Restoration: Periodically test restoring files to ensure your backups are functioning correctly.
Limitations of File History
While File History is a useful tool, it’s important to be aware of its limitations:
- No System Backup: File History does not back up system files or applications. For a complete system backup, consider using the System Image Backup feature.
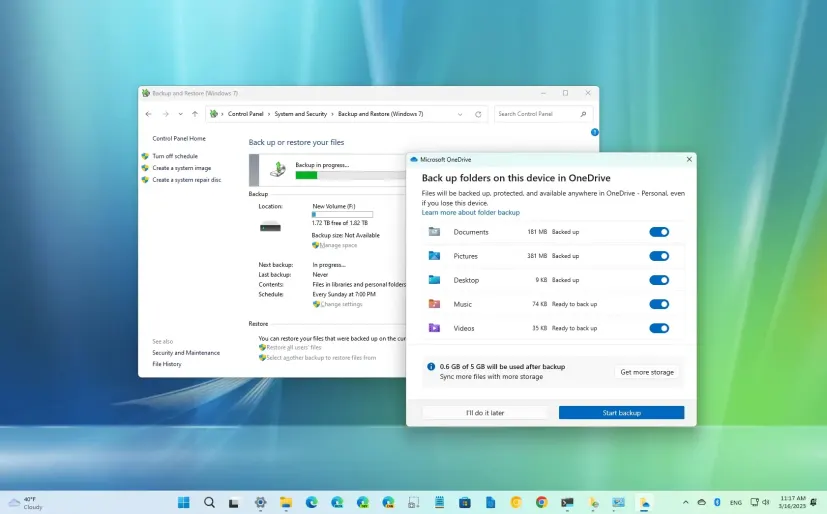
- Limited Cloud Integration: File History does not support cloud storage. For cloud backups, consider using OneDrive or other cloud services.
- External Drive Dependency: File History requires an external drive or network location. If the drive is disconnected, backups will not occur.
Conclusion
File History is a powerful tool in Windows that provides an easy and efficient way to back up and restore your personal files. By setting it up correctly and customizing its settings to fit your needs, you can ensure your important data is protected against loss. Remember to regularly check your backup drive’s space and test the restoration process to maintain the reliability of your backups.