As we have seen in last tutorial, there are two major environments in VB.NET; design and deploy. Design environment houses a toolbox on the left side, which contains different form elements like buttons, Textbox, Drop-Down Lists, Labels etc. We will learn how to insert and use these tools in forms for better results.
As the above image shows, there are around 11 categories of tools. The one we will be working with is Common Controls. The list is bigger enough to take you in bemuse condition. Let’s move ahead step by step starting with Button, Textbox and Label.
Textbox
Textbox is used to type text into it; like log in ID, password, contact number, etc. Click on the arrow in front of “Common Controls” to expand it and search for option Textbox. Double click on Textbox and it will get added to the top left position in your form.
One can drag Textbox to desired position in the form by holding it in a click. Two square dots and a “Play” sign are clearly visible on textbox. Two square dots are meant for resizing textbox in horizontal directions. Click on “play” sign and Multiline option will appear. Check box in front of it and now you can change width and as well as depth of textbox. However, Microsoft expects to use more than one textbox one below other for purpose of Multiline data filling and thus Multiline feature is not active by default. Practicing is what going to make you consummate in all this stuff. For our future use, add 3 textboxes in the form and arrange them one below other. Your form should look something like this.
Label
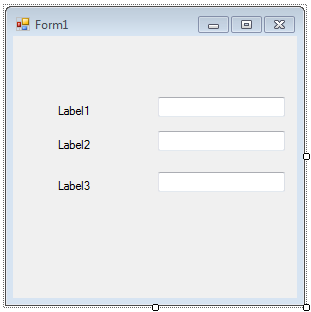
Labels, as name suggest, are used to label or indicate what lies in Textbox in front of it. Adding label to the form is as simple as adding Textbox. Just double click on label option in Common Controls menu and it will get added to the top left corner of the form. Add 3 such labels and aligned them in front of the Textboxes that we have added already. Something like this must look in your form.
Button
Adding a button to the form has more than just inserting it into form design. Buttons perform function like sending data to destination or performing desired operation. Thus, it is associated with some coding. We will learn about it in next few tutorials.
We have added stuff to the form and decorated it a little, but what’s next? To make form and its contents more useful, you have to modify its properties that can be accessed in the bottom right corner of design environment. In the next section, we will learn about these properties. Stay tuned for more!
Sign up for The Geeks Club new letter for updates!


2 Comments