Exploring suspicious files, testing new software, or visiting untrusted websites can expose your main Windows installation to risks like malware, system instability, or privacy breaches. This is where Windows Sandbox comes in as an invaluable tool. Available in Windows 10 Pro, Enterprise, and Education (version 1903 and later), and in Windows 11 Pro, Enterprise, and Education, Windows Sandbox provides a lightweight, isolated, and temporary desktop environment. It’s essentially a disposable virtual machine that allows you to securely test potentially dangerous or unknown content without affecting your host operating system.
This guide will provide a detailed, step-by-step walkthrough on how to use Windows Sandbox for secure testing, covering its prerequisites, how to enable it, and how to effectively utilize its isolated environment.
Windows Sandbox is a built-in feature of Windows that offers a temporary, isolated, and secure desktop environment for testing purposes. It’s perfect for opening suspicious attachments, visiting untrusted websites, or trying out new software without risking your main Windows installation. Every time you close Windows Sandbox, everything in it—including all files, applications, and changes—is permanently deleted, leaving your host system untouched. This makes it an ideal tool for secure testing.
Understanding Windows Sandbox
- Isolation: Runs in an isolated, virtualized environment. Any changes, infections, or issues within the Sandbox do not affect your main Windows system.
- Temporary: Once you close the Sandbox, all data and changes are erased. It’s a fresh, clean Windows environment every time you open it.
- Lightweight: It uses a minimal copy of your current Windows installation, requiring relatively few resources compared to a full virtual machine.
- Built-in: No need to download or install additional software.
Prerequisites for Using Windows Sandbox
Before you can use Windows Sandbox, your system must meet specific requirements:
- Windows Version:
- Windows 10: Professional, Enterprise, or Education edition (version 1903 or later).
- Windows 11: Professional, Enterprise, or Education edition.
- Home editions do NOT support Windows Sandbox.
- Processor: 64-bit processor with virtualization capabilities enabled in the BIOS/UEFI. Most modern CPUs support this, but it might be disabled by default.
- RAM: At least 4 GB of RAM (8 GB recommended for better performance).
- Free Disk Space: At least 1 GB of free disk space (SSD recommended for speed).
- CPU Cores: At least 2 CPU cores (4 cores with hyperthreading recommended).
Step 1: Check and Enable Virtualization in BIOS/UEFI
For Windows Sandbox to work, hardware virtualization must be enabled in your computer’s BIOS/UEFI settings.
- Check Virtualization Status (in Windows):
- Press Ctrl + Shift + Esc to open Task Manager.
- Go to the “Performance” tab.
- Select “CPU” on the left.
- Look for “Virtualization”. If it says “Enabled”, you’re good to go. If it says “Disabled,” proceed to the next step.
- Enable Virtualization in BIOS/UEFI:
- Restart your computer.
- As it’s booting up, repeatedly press the BIOS/UEFI key (common keys: F2, F10, F12, Del, Esc – varies by manufacturer like Dell, HP, Lenovo, ASUS, Acer). You might need to check your PC’s manual or manufacturer’s website for the exact key.
- Once in the BIOS/UEFI setup utility, look for settings related to “Virtualization Technology,” “Intel VT-x,” “AMD-V,” “SVM Mode,” or “Virtualization Extensions.“ These settings are usually found under CPU Configuration, Processor, System Configuration, or Security menus.
- Enable this setting.
- Save and Exit: Save the changes and exit the BIOS/UEFI setup. Your computer will restart.
Step 2: Enable Windows Sandbox Feature
Once virtualization is confirmed, you can enable the Windows Sandbox feature in Windows.
- Open “Turn Windows features on or off”:
- Right-click the Start button and select “Run”.
- Type optionalfeatures.exe and press Enter.
- Alternatively, search for “Turn Windows features on or off” in the Start menu and open it.
- Locate and Enable Windows Sandbox:
- In the “Windows Features” dialog box, scroll down and find “Windows Sandbox.”
- Check the box next to “Windows Sandbox.”
- Confirm and Install:
- Click “OK.” Windows will begin installing the necessary components. This might take a few moments.
- You will likely be prompted to restart your computer to complete the installation. Click “Restart now.”
Step 3: Launch and Use Windows Sandbox for Secure Testing
After enabling the feature and restarting your PC, you can now launch and begin using Windows Sandbox.
- Launch Windows Sandbox:
- Click the Start button.
- Search for “Windows Sandbox” and click on the application to open it.
- It will take a moment to initialize as it creates a fresh, clean environment.
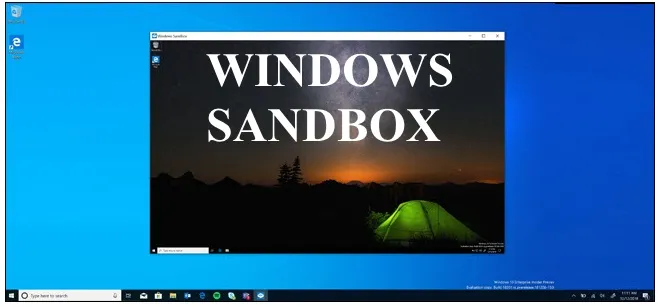
- The Sandbox Environment:
- A new window will appear, which looks and feels like a miniature, clean instance of Windows.
- It will have a basic desktop, a Recycle Bin, and a default web browser (Microsoft Edge).
- There’s no pre-installed third-party software, making it a truly clean slate.
- Transferring Files to the Sandbox:
- Method A (Copy-Paste): You can directly copy and paste files from your host PC into the Sandbox. Simply copy the file on your main desktop, then paste it into the Sandbox window.
- Method B (Drag-and-Drop): You can drag and drop files from your host desktop directly into the Sandbox window.
- Testing Files or Applications:
- Once the file is in the Sandbox, you can open it, run it, or install it just as you would on your regular PC.
- For example, you can open a suspicious PDF, run an unknown executable, or install a new browser to test it.
- You can also open the built-in Microsoft Edge browser to visit untrusted websites.
- Internet Access (Default): Windows Sandbox typically has internet access by default, allowing you to test web applications or download files within the isolated environment.
- Admin Privileges: You have administrator privileges within the Sandbox, allowing you to install software without restriction.
Step 4: Exiting and Disposing of the Sandbox
The temporary nature of Windows Sandbox is its core security feature.
- Close the Sandbox:
- To exit and dispose of the Sandbox, simply close the Windows Sandbox window by clicking the “X” button in the top-right corner, just like any other application.
- Confirm Closure:
- A confirmation dialog box will appear, warning you that “All content of the sandbox will be discarded and permanently lost.”
- Click “OK” (or “Confirm”) to close the Sandbox.
- Complete Eradication: All files, applications, and changes you made within that Sandbox session are immediately and permanently deleted. The next time you open Windows Sandbox, it will be a completely fresh, clean instance.
Advanced Usage (Optional)
For more advanced users, Windows Sandbox can be configured using .wsb configuration files (Windows Sandbox Configuration files).
- Creating a .wsb File:
- Open Notepad.
- Type or paste XML code to define Sandbox behavior. For example:
XML
<Configuration>
<VGpu>Disable</VGpu> <Networking>Disable</Networking> <MappedFolders>
<MappedFolder>
<HostFolder>C:\MyTestFiles</HostFolder> <SandboxFolder>C:\Users\WDAGUtilityAccount\Desktop\MyTestFiles</SandboxFolder>
<ReadOnly>true</ReadOnly> </MappedFolder>
</MappedFolders>
</Configuration>
-
- Save the file with a .wsb extension (e.g., MySecureSandbox.wsb).
- Running a Configured Sandbox: Double-click the saved .wsb file to launch the Sandbox with your custom settings.
Common .wsb Configurations:
- <Networking>Disable</Networking>: Disables internet access within the Sandbox, useful for testing offline malware.
- <VGpu>Disable</VGpu>: Disables virtual GPU, which can reduce performance but potentially increase stability on some systems.
- <Memory>2048</Memory>: Sets the maximum RAM for the Sandbox (e.g., 2048 MB = 2 GB).
- <LogonCommand>: Executes a command or script immediately after the Sandbox starts (e.g., to launch an installer).
By effectively utilizing Windows Sandbox, you create a powerful, isolated environment for secure testing of any questionable software or content, protecting your main Windows system from potential harm. It’s a fundamental tool for anyone who frequently deals with unknown files or wants to maintain a pristine operating system.


